|
|
Since Astra Malorum hit, I've been bouncing between solo runs and messy squad attempts, and the map finally feels settled now that the post‑115 Day chaos has died down. If you're coming in during the Season 01 Reloaded lull, you're not late—you're just skipping the worst of the launch headaches, and that's a win. A lot of people ask about "easy" setups, but honestly the biggest help is having a plan and a steady lobby; if you're testing routes or practicing steps, a CoD BO7 Bot Lobby can make the learning curve way less punishing without turning the whole run into a sweat-fest.
I stopped forcing shotguns early. They're fun, sure, but they slow your points and that delays Pack-a-Punch. I've had smoother starts with the Maddox RFB or Kogot-7—anything that tags a bunch of zombies fast and keeps ammo pressure low. For Field Upgrade, I don't really debate it anymore: Aether Shroud. It's not flashy, it's just reliable, and later steps punish you hard if you can't drop aggro on demand. I also lean Combat Goblin over the Support one, because that little distraction window buys you breathing room when you're trying to do objective stuff instead of just surviving.
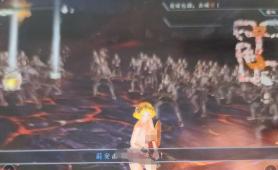
Getting power online is simple: push toward the Observatory Dome and use the Harmonic Oculus, then deal with the OSCAR lockdown. The key is staying calm and shooting down his UFO projectile as soon as it shows up, because you'll want that crashed piece later and it's easy to forget in the moment. Once power's handled, make the LGM-1 Wonder Weapon your whole personality. Don't bargain with it. The part spawns are consistent—Museum Infinitum, the Cryo Chambers area, and by the Telescope—so just run the loop, build it, and upgrade at the bench as soon as you can.
This is where most squads start bleeding revives. You need three Absolute Zero fragments from the glowing purple crystals, and I usually wait until around round 15 so I'm not made of paper. The telescope alignment can also act weird. If the aim drifts when you're lining up Mars, back out and re-enter the interaction—don't overthink it, it often fixes the logic. Then punch the DEC coordinates into the machine in Machina Astralis and keep your pace up; the longer you linger, the more the map starts taxing your ammo and patience.
The Brain Extraction step is the real run-killer. Grab the Rock Saw in the Museum, open the body in Cryo, then commit to the slow carry with the Perfusion Machine like you're escorting a fridge through a zombie movie. This is where Aether Shroud earns its keep, because you can't sprint your way out of bad positioning. After that, the symbol matching is basically a memory check with the organ keys, and then you're staring at Caltheris. Run PHD Flopper if you value your armor, keep moving, and dump LGM-1 damage into the core when it's safe—no hero moments. If you're the type who likes to stay stocked on boosts or grab extra in-game items between attempts, it's worth checking RSVSR since it's built around game currency and item services that can help you keep your prep consistent without derailing your grind.RSVSR is where Black Ops 7 feels less like guesswork and more like solid runs with people who've actually finished the Astra Malorum quest. That Saturn-side skull observatory is gorgeous and nasty, and if you're stuck on telescope alignments, crystal fragments, or the slow brain-carry lockdown, you'll find practical fixes and loadout ideas that hold up in real matches. Tap in for guides, fresh 115 Day updates, and a community that won't clown you for asking "why's this step drifting" https://www.rsvsr.com/call-of-duty-black-ops-7 Join the vibes, chase that Caltheris cutscene, and earn the win the hard way.
|
|


 发表于 2026-1-30 15:19:59